There is a huge variety of facial treatments that help maintain personal appearance.
Some of these are strictly done by estheticians; however, there are others you can do from the comfort of your own home.
Dermaplaning is a treatment that has been all the buzz lately and while you can pay to get it done in a professional setting, you can also learn how to do it safely at home.
If you’d like to learn how, below I have a complete at-home dermaplaning guide that will teach you everything you need to know about dermaplaning your own face.
Each step is explained in much more detail below, and you can also find a list of tools you can use, as well as my answers to some frequently asked questions.
How To Do Dermaplaning At Home:
- Step 01: Make sure the skin is clean
- Step 02: Pull the skin taught
- Step 03: Start at the top of the ear
- Step 04: Move to the sides of the face
- Step 05: Stroke the neck
- Step 06: Respect the blade

What Is Dermaplaning?
Dermaplaning is a form of exfoliation that’s quick and easy, has no downtime, and gives instantly visible results.
It is a professional procedure involving a sharp tool used to scrape off the top layer of the skin, remove dead skin cells from the surface, and get rid of fine vellus hair known as peach fuzz.
This treatment is completely pain-free even though there is the use of a sharp blade involved and it leaves you with virtually no downtime.
What’s great about this treatment is that it can be done inside the comfort of your own home because you can find safe devices with goofproof blades all over the internet.
However, it is important to note that getting this treatment done by a skillful aesthetician will be slightly different because of the professional tools and products they are using.
What Are Dermaplaning Benefits?

Like most exfoliation techniques, dermaplaning prevents breakouts by removing the top layer of dead skin cells so that they don’t get trapped inside your pores and clog them.
By gently exfoliating the skin, dermaplaning also makes it easier for beneficial ingredients from skincare products to penetrate deeper and be absorbed by the skin.
Dermaplaning removes soft facial hair that traps dirt and natural oils and reveals a brighter and smoother complexion.
It also helps your makeup go on smoothly and stay looking fresh for a longer time.
How To Do Dermaplaning At Home (Explained)
You can learn how to dermaplane at home by following the few steps below:
Step 01: Make sure the skin is clean.
Again, I cannot stress how important it is that there isn’t anything on the surface of the skin that can potentially be pushed deeper and cause some other problems.
Therefore, make sure that you cleanse your skin thoroughly with a gentle cleanser and pat it dry before starting.
Step 02: Pull the skin taught.
Keep the blade at a 45-degree angle against the skin once you pull the skin taught and very gently start moving downwards in short strokes.
Don’t rush and try to get it over with quickly. Becoming comfortable with the blade and the movements will take some time, so you need to take things slow and easy.
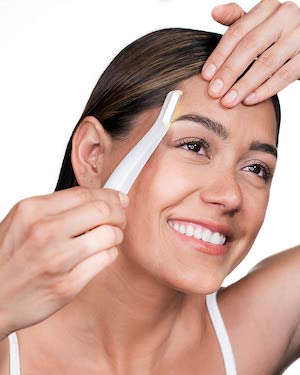
Step 03: Start at the top of the ear.
And continue to make short strokes downward, moving to the jawline and towards the nose to get the cheek, jawline, chin, and upper lip.
The jawline requires special attention because the skin here is usually thin, and it needs to be really stretched out so that you can glide easier.
If you do not feel comfortable with dermaplaning your jawline, it is best that you leave it out until you become comfortable with handling the blade.
Step 04: Move to the sides of the face.
Gently glide the blade by the eyes, close to the eyebrows, and the forehead using short, downward strokes.
Avoid the hairline, eyelids, and sides of the nose.
Step 05: Stroke the neck.
Proceed to make short, downward strokes on the neck from the jawline, should you need to do that.
Step 06: Respect the blade.
My trainer kept repeating, “Respect the blade! Respect the blade!” during our dermaplaning sessions whenever she caught someone trying to do longer moves in order to get it over with.
Learning dermaplaning, as with all other things, takes time and patience, and you should respect the blade because you can really hurt yourself if you don’t.
Don’t try to get it over with by thinking that you will “learn quicker” by doing long and fast strokes. Take your time to learn and figure out what works best for you.
5 Tools You Can Use For Dermaplaning At Home
There are many different at-home dermaplaning devices you can purchase online.
You can find absolutely anything from high-tech devices that practically do all the work for you (but are on the pricier side) down to the old school Tinkle Razor that costs less than $10.
Here are some of my favorite dermaplaning tools:
Tinkle Razor
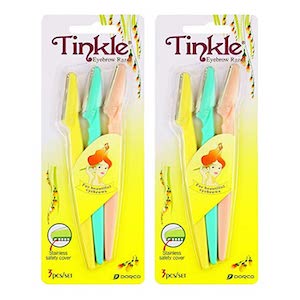
Tinkle razors will give you the best bang for your buck if you want to try dermaplaning on a budget without having to worry that you are throwing money down the drain if you damage the tool.
These razors are intended for eyebrow shaping; however, they work efficiently on the entire face due to their convenient shape.
Shiseido Facial Razor
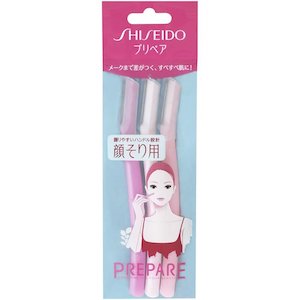
Much like the Tinkle razor, the one by Shiseido is an affordable option for dermaplaning which serves both beginners and experienced users.
This three-piece set gives you a great bang for your buck and while there isn’t any significant difference between the two, I always keep both Tinkle and Shiseido in my cabinet, just in case.
Finishing Touch Glo Lighted Facial Exfoliator
Now, I was initially disappointed with this product because as soon as I received it, I realized that the batteries were needed for the light and the device itself wasn’t electronic.
However, I gave it a chance and I ended up liking it. It has a protective edge that won’t really save you from being cut but it will somewhat prevent it, unlike some other devices and the blade is pretty efficient in doing its job.
Panasonic Facial Hair Trimmer
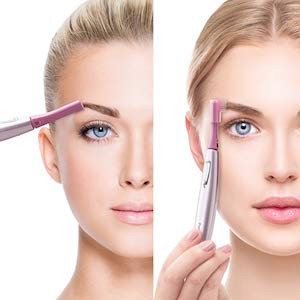
I absolutely love this device, and given that it’s made by Panasonic, you know it will last you for a very long time. I use this when I want to do a quick dermaplaning treatment without having to think about this little area or that little area.
The device grabs onto everything, and it is super easy to use.
SIMA Sonic Dermaplaning Tool
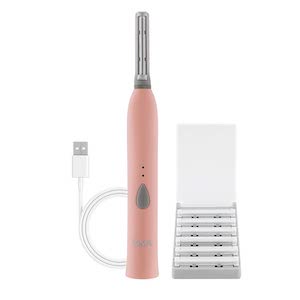
I like the SIMA Sonic dermaplaning tool because it’s not crazy expensive, but it still gives you that nice, luxurious feeling expensive devices do.
It features three optional speed settings, and it’s a rechargeable device, which works great for me because I can never find batteries in my house even after just purchasing a packet.
Additionally, it comes with replaceable blades, which are recommended to be replaced after every use, but I don’t really do that when I am using the device on myself only.
Frequently Asked Questions About Dermanplaining At Home

How To Prepare The Skin For Dermaplaning?
The only thing you need to do to prepare the skin for dermaplaning is to make sure your skin is squeaky clean, and there are no traces of any skincare product, makeup, or grime left on the surface.
Therefore, the only thing you need to do is cleanse your face and leave your skin raw unless you want to apply facial oil and use it as a medium to help the blade glide across the skin with ease.
Do You Dermaplane On Wet Or Dry Skin?
When dermaplaning, make sure your skin is squeaky clean and very dry.
You can also do dermaplaning by using facial oil as a medium to help the blade glide easier across the skin, however, this is an advanced technique, and you can easily slip and hurt yourself if you are not experienced with handling the blade.
So, start with dry skin until you get comfortable and learn how to do dermaplaning on yourself.
Can Your Dermaplane Your Upper Lip?
Yes, you can dermaplane your upper lip and chin, too.
In fact, when you have a professional dermaplaning treatment done, your esthetician will surely dermaplane your upper lip and chin.
The hair on the upper lip area will grow a bit coarser than the rest of the face. However, it’s not going to be significantly different.
How Often Should You Dermaplane At Home?
How often you dermaplane depends entirely on your personal needs; however, you should not do it more than twice a month.
I feel like even twice a month might be too much for most people; therefore, always make sure to listen to your skin and provide it with the treatments it can handle.
In case your skin starts to show signs of redness and irritation, this may be a sign that you are dermaplaning too often and that you should give it a break.
Is Dermaplaning At Home Safe?
Dermaplaning can be safely done at home; however, you do need to be careful because, as I already said above, there is the use of a sharp tool involved.
While the tools and devices usually sold on the internet are intended for home use (typically for eyebrow shaping), you can definitely risk getting cut if you are not being careful with the blade and don’t prepare your skin properly.
What To Do After Dermaplaning?
After you’ve finished your dermaplaning session at home, you should cleanse your face and neck with a gentle, pH-balanced cleanser to get rid of some peach fuzz and dead cells left on the skin.
What To Avoid Doing After Dermaplaning?
After you’ve done dermaplaning at home, I would suggest you skip actives in your routine for the next 24-48 hours. By this, I mean avoid using retinoids, vitamin C, or any form of exfoliation.
Each of these is most likely to trigger irritation and sensitivity after dermaplaning.
What Should You Put On Your Face After Dermaplaning?
After doing dermaplaning and cleansing your face at home, your skin will most probably look red and feel irritated. Therefore, try to apply skincare products that contain soothing and calming ingredients as these will help the skin to replenish itself.
Some ingredients with skin-replenishing properties are niacinamide, bisabolol, licorice extracts, allantoin, panthenol, green tea extracts, etc.
Can You Dermplane While on Accutane?
Dermaplaning can be a great exfoliation treatment for people that aren’t taking Accutane, but it’s not recommended for those that are.
This is because Accutane can make the skin extremely sensitive and susceptible to irritation, which can be amplified if the treatment is done while on Accutane.
Should You Moisturize After Dermaplaning?
Yes, you should always moisturize after dermaplaning, as moisturizers will soften your skin and create an occlusive barrier that will prevent moisture loss and keep your skin healthy and lubricated.
Additionally, it’s always a good idea to do dermaplaning in the evenings before bed. Going out on the sun after doing this treatment may cause skin sensitivity, flushing, redness, itchiness, and other unwanted reactions.
Moreover, make sure to always protect your skin with a high SPF, especially after having an exfoliating treatment such as dermaplaning.
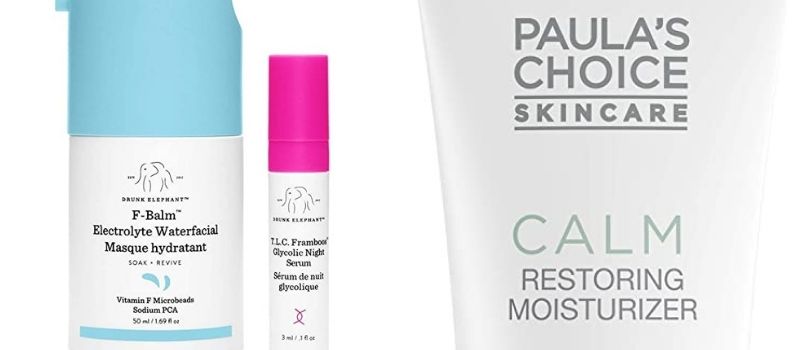
Some of my favorite calming moisturizers I use after dermaplaning my face are:
- Drunk Elephant F-Balm Electrolyte Waterfacial
- Paula’s Choice – CALM Redness Relief Moisturizer
Can You Use Niacinamide After Dermaplaning?
It’s best to use a moisturizer (as mentioned above) for a few days after you do a dermaplaning procedure. You can start/continue using niacinamide after 3-4 days.
Can Dermaplaning Cause Hair To Grow Thicker?
Alright, let’s get this rumor done with once and for all. When you dermaplane, you are removing very fine hair called vellus hair.
This hair is so thin and soft that removing it with a dermaplaning razor will have no impact on how it looks when it grows back.
Your hair will grow back exactly the same color and thickness as it was previously. You cannot change the structure of your hair follicle by shaving your hair off.
And the science behind this claim is that dermaplaning doesn’t go deep enough to affect the active stem cells of hair follicles, which are located deeper in the dermis.
It will take about two weeks for the vellus hair to grow back, and at this point, you can dermaplane again.
Is Dermaplaning Bad For Your Skin?
Dermaplaning isn’t bad for your skin, but this treatment is not for everyone.
While this treatment is the complete opposite of being “bad for your skin”, there are some conditions that are contraindicated to this type of exfoliation.
If you currently have active acne or susceptibility to rashes, fever blisters, and cold sores, dermaplaning may not be the ideal treatment for you.
Dermaplaning involves scraping the skin with a sharp tool for exfoliating purposes, and this may cause a reaction or flare-ups to your current condition.

My name is Simone and I am a certified skin specialist. I created this website to teach my readers how to take great care of their skin and I also like to occasionally share my honest opinions on skincare products I’ve tried. You can learn more about me here.
The Acne Solution: Your Ultimate Guide To Flawless Complexion

An extensive, no-nonsense course showing you how to never have acne again, from a licensed Esthetician specializing in oily/acne-prone skin.
Thanks for sharing this, I really did learn something new. I love beauty and make-up I always have done, it was interesting to read. I like that you have covered a lot of aspects, especially what happens after you do the treatment. My only questions I am left with is what about skin type? I know you mentioned you have oily skin what if you have very dry skin could this be a suitable treatment or does the type not really matter? If someone is a bit nervous about this and not comfortable to do it themselves on average what would the cost be at the salon? Lastly, would you recommend this over and above hair removal processes like threading? Great article nice to learn about alternative hatr removal processes.
Hello there! 🙂
Thank you for your comment.
I am happy that you found my article an interesting one to read.
As an answer to your first question regarding skin type, I would like to reassure you that any skin type including dry will benefit from this exfoliating treatment.
This isn’t an abrasive treatment and no chemicals are used while performing dermaplaning, so there is no need for you to worry. I would like to point out that sensitive skins will show mild redness, and this is very normal and nothing to worry about.
Secondly, you can absolutely go to a salon and get this service done by an aesthetician if you don’t feel comfortable doing it yourself. The price usually depends on the area you live in. I live in Europe, and here this treatment goes anywhere between €45 – €60. So, checking in with a salon in the area you live will probably be more helpful.
I would recommend you to put threading on hold while experimenting with dermaplaning and see what works better for you after trying out both treatments with a break of a week or two in between. 🙂
Hi, Simone
Thanks for the insight information on derma planning at home. My daughter is very much sensitive to skin care products and has regular acne popping up somewhere on the face. Is it OK to use this procedure by her while acne is starting or to be postponed till it subsides? What precautions need to be taken while derma planning at home.
Warm Regards,
Gaurav Gaur
Hello there!
Thank you for your comment. I am happy you found my post on dermaplaning helpful.
Acne is absolutely contraindicated to this treatment, so I would absolutely stay away from dermaplaning until the condition subsides.
However, if there are a few pimples here and there, this treatment can still be safely performed, you just have to avoid dragging the razor across the irritated area.
The subject of skin care is a concern for women (me too) and you have done an excellent job for answering many questions related to this subject. You are very thorough in your discussions that are of interest to everyone.
I was surprised that you gave the pros and cons in using this Tinkle Razor which shows you have empathy with women who want this procedure.
I have observed many women with long and thick fuzz on their face. Do you recommend a subtle approach to have these women recognize that their fuzz is very noticeable and they need the “knife” solution? Really, they could benefit from reading this website!!
I needed this website because I was using tweezers to pull out the fuzz and sometimes I used a razor!! I am 75 and am still bothered about how I look. Imagine that!
Can you use the Tinkle Razer to shape the eyebrows? It is fine with me if the Tinkle Razer is “old school” since I am old myself and I believe this procedure will not be the lowest but will be the highest because your website gets one so excited about the technique and the wealth of information about other worries too
I like your writing skills. Where did you learn to write so well or is that– good?
Hi – Thanks for the post. It’s a topic that is on the minds of many women! My wife has tried many different products and methods but not sure she is aware of this one…I will have to mention it to her. You mentioned you experienced redness on your skin after performing dermaplaning, do you have any advice or recommendations on applying something “pre”-dermaplaning to prevent or reduce the redness? Thanks!
Hello there and thank you for your comment!
I am happy that you found my post helpful.
Yes, I did experience mild redness on my face after dermaplaning at home but this reaction is very normal and to be honest, I was actually expecting something much worse as I have problematic skin.
I wouldn’t recommend dermaplanning on dry skin and I would also stay away from shaving foams, as I have found these two methods more difficult and my skin had a much more intense reaction and persisting redness after trying them out.
The only thing I would recommend to be applied before the procedure is a non-sticky and non-irritating cream as it makes the process much smoother and reduces the risk of inflammation.
How can i know the type of toner, cleanser, exfoliator and moisturizer to use. I have oily skin
Hi there! I have an entire category of articles for oily skin types that you can check out.
Also, check out the following posts:
Best pore-clearing cleansers
The complete guide to salicylic acid
Best toners for oily skin
Best water-based moisturizers for oily skin
I hope that helps! x